Ubuntu22.04的环境配置(CTF-PWN)
Ubuntu22.04的环境配置(CTF-PWN)
前言:如果是小伙伴是和笔者当初刚上大一时,连windows命令行怎么打开都不知道一样的情况的话,建议先安装 VMware Workstation,再下载 ubuntu-22.04的镜像[ ubuntu-22.04.5-desktop-amd64.iso](下载地址:Ubuntu 22.04.5 LTS (Jammy Jellyfish)),安装好Ubuntu22.04虚拟机。
首先我们拿到一个刚安装好的ubuntu22.04,非常干净。
更新、安装vim gedit
1 | sudo apt upgrade |
接下来我们就会频繁地使用vim编辑器(ubuntu系统自带了一个 vi 编辑器)
而你现在需要知道的有:
按I进入编辑,esc退出编辑,:wq保存
更换镜像源
1 | cd /etc/apt # 进入 apt 目录下 |
编辑完成后,更新一下
1 | sudo apt update |
安装 git
1 | sudo apt install git |
安装并更新 pip
1 | sudo apt install python3-pip |
将其设置默认 pip 版本
1 | 若显示 rm: 无法删除 '/usr/bin/pip': 没有那个文件或目录,则直接执行下面那一句 |
更换 pip 源
1 | pip config set global.index-url https://pypi.tuna.tsinghua.edu.cn/simple |
你可以执行以下命令来验证设置是否生效:
1 | pip config get global.index-url |
输出应该是:
1 | https://pypi.tuna.tsinghua.edu.cn/simple |
迁移 pip 库(可选)
(本篇教程所针对的Ubuntu 22.04 是刚刚安装好的全新系统,且之前 没有在系统 Python(3.10)或其他版本上安装过任何 pip 库,不需要迁移 pip 库)
1 | pip freeze > requirements.txt |
为防止 python 版本造成的 pip 库不兼容,使用以下脚本去掉 requirements.txt 中的版本号:
1 | pythondef remove_versions(input_file, output_file): |
然后执行:
1 | pip install -r requirements_no_version.txt |
这样默认安装的就是支持当前 python 环境的最新版本 pip 库了
安装 32 位库
1 | sudo dpkg --add-architecture i386 |
安装 Capstone
1 | sudo git clone https://github.com/capstone-engine/capstone.git /opt/capstone |
验证
1 | ls /usr/lib | grep capstone |
你应该能看到:
1 | libcapstone.a |
安装 pwntools
1 | sudo python3 -m pip install pwn |
安装 GDB(一般系统会自带,直接终端输入gdb,如果没有再装 )
1 | sudo apt install gdb |
安装 gdb-multiarch
1 | sudo apt install gdb-multiarch |
安装 pwndbg(gdb的插件)
1 | sudo apt update |
但笔者在启动gdb遇到了这个问题
GDB 在加载 Pwndbg 时自动更新依赖,但因为 .venv/uv.lock.hash 文件权限问题,导致 PermissionError
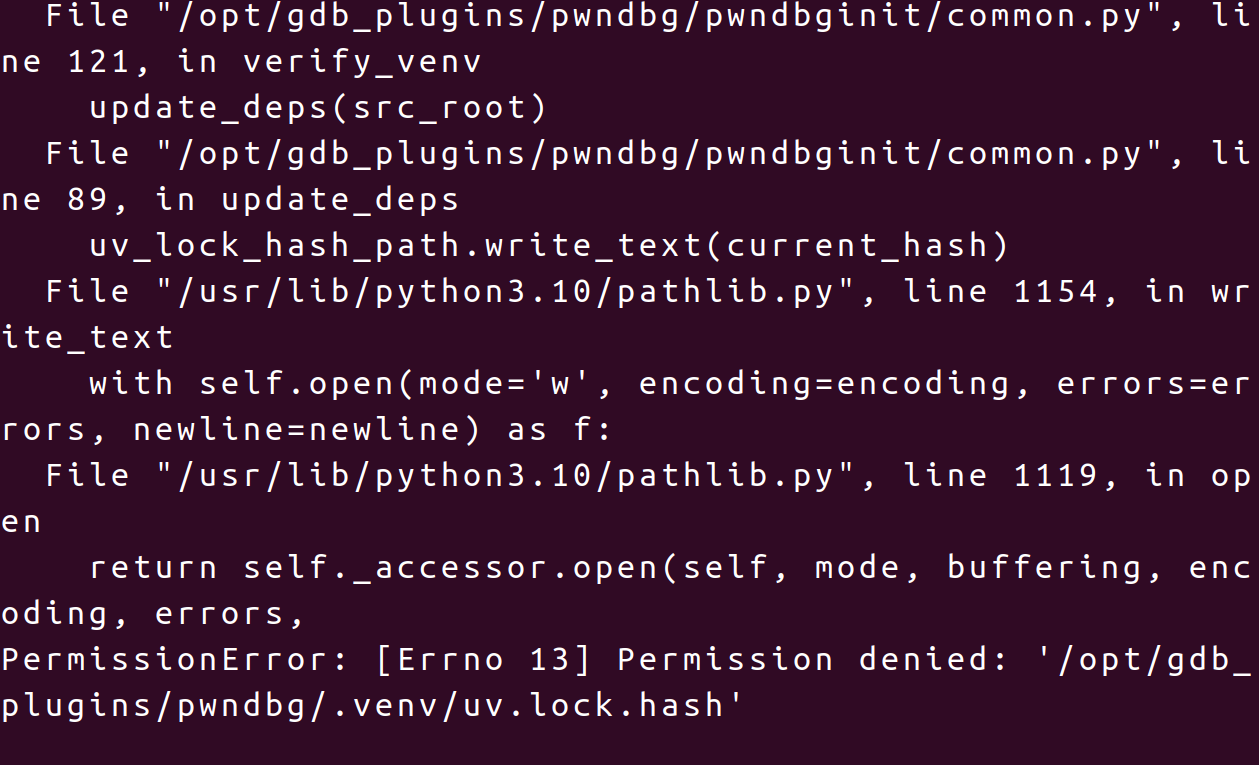
这是因为Pwndbg 的 .venv 环境是在 sudo 权限下建立的,因此相关文件(包括 .venv/uv.lock.hash)是 root 用户所有,但你现在是普通用户运行 gdb,所以没有权限写入这个文件。
笔者找到的解决方案是:关闭 Pwndbg 的自动依赖更新
1 | vim ~/.bashrc |
保存并退出后
1 | source ~/.bashrc |
安装 Pwngdb
1 | sudo git clone https://github.com/scwuaptx/Pwngdb.git /opt/gdb_plugins/Pwngdb |
在 define hook-run 这一句的前面的4行语句删掉,插入这三行
1 | source /opt/gdb_plugins/pwndbg/gdbinit.py |
安装 LibcSearcher
1 | pip3 install LibcSearcher -i https://pypi.tuna.tsinghua.edu.cn/simple |
安装 one_gadget
1 | sudo apt install ruby |
安装 glibc-all-in-one
1 | sudo git clone https://github.com/matrix1001/glibc-all-in-one.git /opt/glibc-all-in-one |
使用的话
由于(Ubuntu 22.04)没有 /usr/bin/python,因为新版 Ubuntu 只默认安装 python3,而不再自带 python可能会报错:报错:
1 | ./update_list: /usr/bin/python: bad interpreter: No such file or directory |
说明:
这个脚本的第一行是:
1 | #!/usr/bin/python |
修改
1 | sudo vim update_list |
1 | #!/usr/bin/python --> #!/usr/bin/python3 |
然后使用
1 | cd /opt/glibc-all-in-one # 先切换目录 |
下载好的glibc一般默认下载到 glibc-all-in-one 的 /libs 目录下的。
安装 patchelf
1 | sudo apt install patchelf |
安装 main_arena_offset
1 | sudo git clone https://github.com/IZAY01/py_main_arena_offset /opt/py_main_arena_offset |
使用的话
1 | from pymao import * |
安装seccomp-tools
1 | sudo apt install gcc ruby-dev |
安装Alpha3
1 | sudo git clone https://github.com/TaQini/alpha3.git /opt/alpha3 |
安装 gcc-multilib 以支持编译 32 位程序
1 | sudo apt install gcc-multilib |
安装AE64
1 | sudo git clone https://github.com/veritas501/ae64.git /opt/ae64 |
接下来是一些入门新人可以选择性安装的东西,可以忽略
安装 QEMU
安装相关依赖
1 | sudo apt install qemu qemu-kvm virt-manager bridge-utils binfmt-support |
1 | 安装依赖库 |
下载源码并解压缩编译
1 | wget https://download.qemu.org/qemu-9.0.0.tar.xz |
编译完成后,会在 build 目录下生成 x86_64 架构下的 QEMU 本体:qemu-system_x86-64
在终端验证安装:
1 | qemu-system_x86-64 --version |
查看 QEMU 安装路径:
1 | which qemu-system-x86_64 |
另外,QEMU 默认没有网络脚本文件,需要自己进行创建
在 /usr/local/etc 目录下(也有可能是 /etc 目录下,可以到时候根据报错路径来确定),新建 qemu-ifup 文件:
1 | !/bin/sh |
增加权限:
1 | sudo chmod 755 /usr/local/etc/qemu-ifup |
安装 Zsteg
1 | sudo gem install zsteg |
安装 Zsh(个人觉得可以故推荐)
1 | sudo apt update && sudo apt upgrade |
输入 y 将默认 shell 更改为 zsh:
1 | bashLooking for an existing zsh config... |
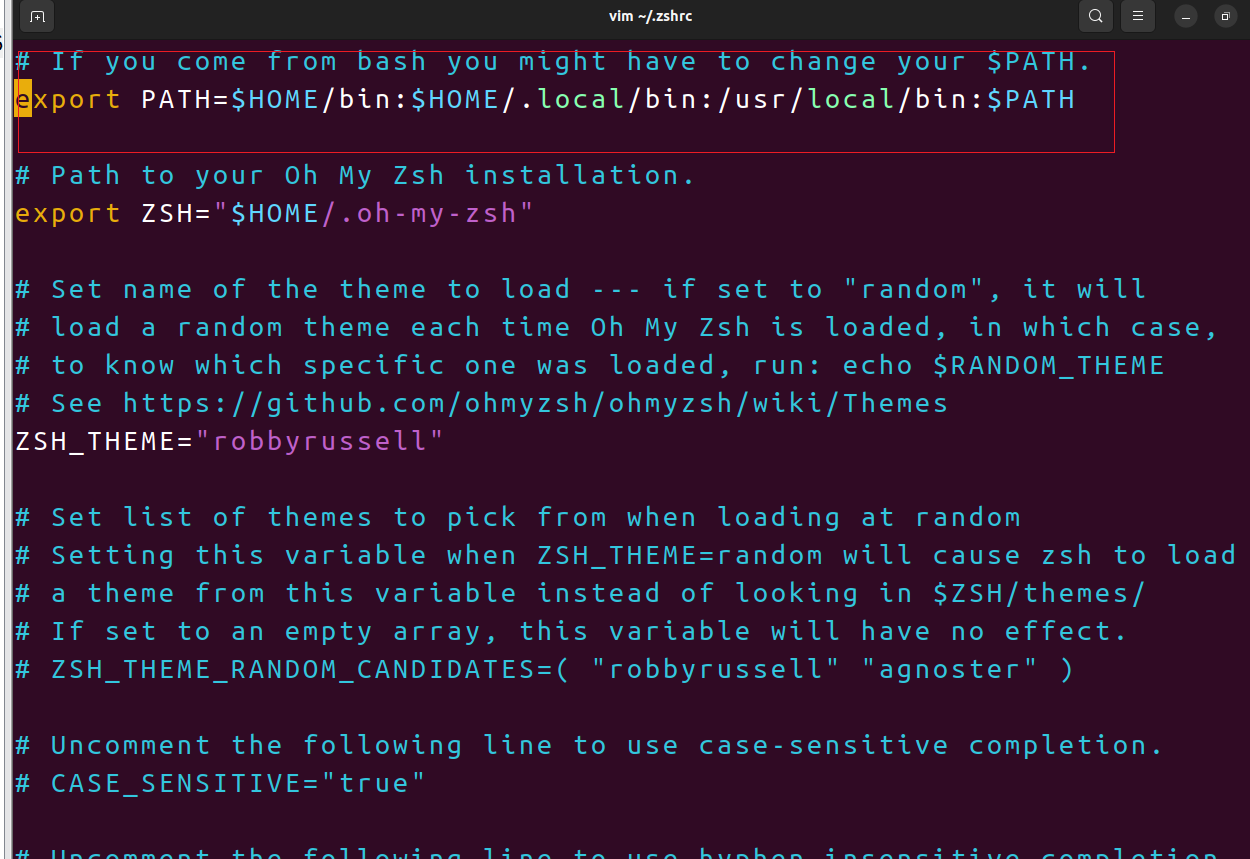
添加原来 bash 的环境变量,将 ~/.zshrc 的第二行取消注释:
1 | vim ~/.zshrc |
1 | source ~/.zshrc |
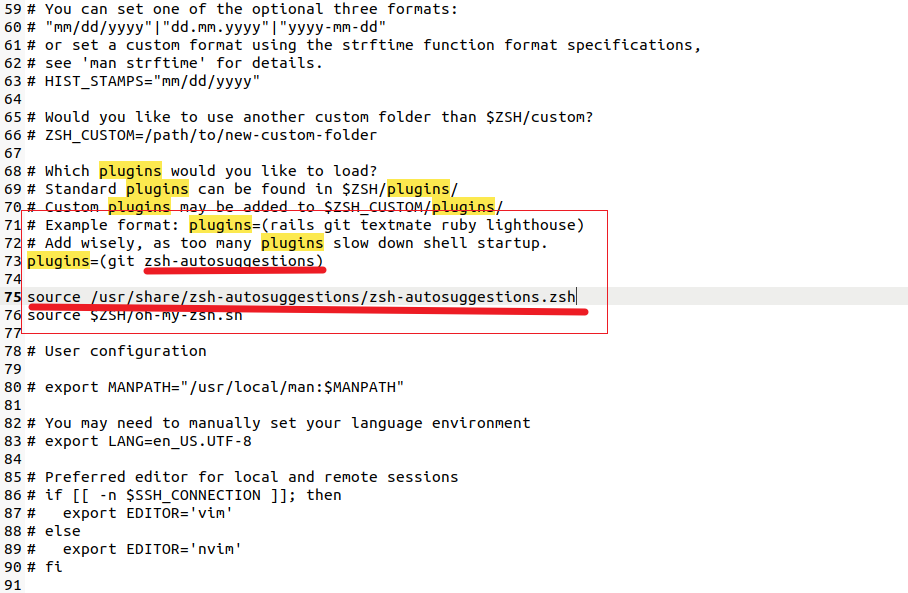
配置 zsh-autosuggestions
1 | sudo apt install zsh-autosuggestions |
1 | 打开 zsh 配置文件: |
保存退出后,更新 ~/.zshrc 使配置生效:
1 | source ~/.zshrc |
如果报错:
1 | ➜ ~ source ~/.zshrc |
这是因为前面并没有把插件的代码仓库克隆到本地位置上,所以插件其实并没有被安装
将插件克隆到本地:
1 | sudo git clone https://github.com/zsh-users/zsh-autosuggestions ~/.oh-my-zsh/custom/plugins/zsh-autosuggestions |
更新 ~/.zshrc 使配置生效:
1 | source ~/.zshrc |
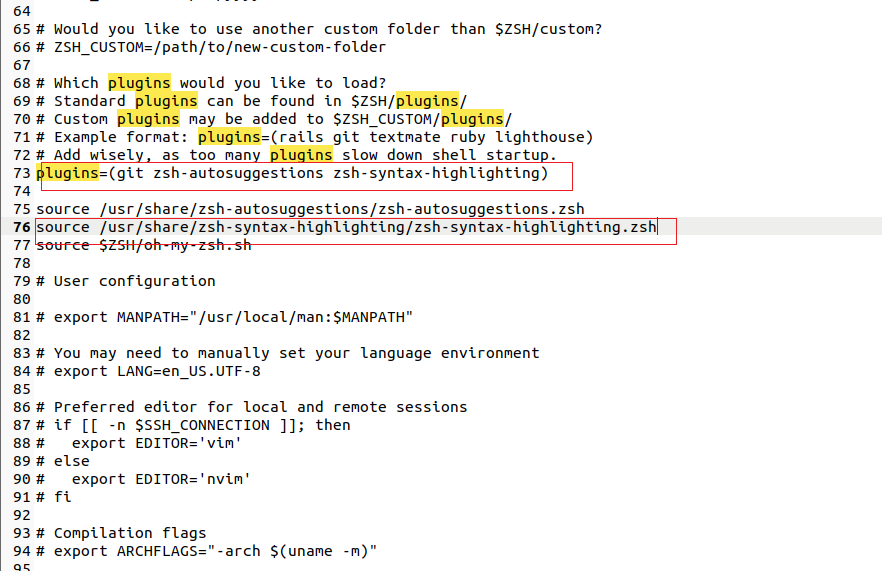
配置 zsh-syntax-highlighting
1 | sudo apt install zsh-syntax-highlighting |
打开 zsh 配置文件:
1 | sudo gedit ~/.zshrc |
搜索 plugins,在 plugins 后面添加插件 zsh-syntax-highlighting (空格隔开)
并加入插件 zsh-syntax-highlighting 的默认保存地址:
1 | plugins=(git zsh-autosuggestions zsh-syntax-highlighting) |
如遇到
1 | ➜ ~ source ~/.zshrc |
将插件克隆到本地
1 | ➜ ~ sudo git clone https://github.com/zsh-users/zsh-syntax-highlighting.git ~/.oh-my-zsh/custom/plugins/zsh-syntax-highlighting |
更新 ~/.zshrc 使配置生效:
1 | source ~/.zshrc |
查看 zsh 自带的主题:
1 | cd ~/.oh-my-zsh/themes && ls |
打开 zsh 配置文件:
1 | sudo gedit ~/.zshrc |
搜索 ZSH_THEME:
默认主题是 robbyrussell,可以根据个人喜好自行修改
如果设置为:ZSH_THEME="random",则每次打开终端时,主题都是随机的
如果不知道选哪个主题好,也可以先将主题设置为随机,然后每次打开 zsh 后都会显示:[oh-my-zsh] Random theme 'xxx' loaded
其中 xxx 就是该主题的名字,遇到喜欢的,就将其加到 ZSH_THEME 中
修改好后,更新 ~/.zshrc 使配置生效:
1 | source ~/.zshrc |
配置 pwndbg 分屏调试(个人觉得可以故推荐)
配置很简单,先后打开两个终端
假设先打开的一个终端用于开启 gdb 调试并输入调试命令,后打开的一个终端用于输出调试信息
在两个终端分别输入 tty,先打开的终端为 /dev/pts/0,后打开的为 /dev/pts/1` (以自己的实际输出信息为主)

修改 ~/.gdbinit 中的内容:
1 | sudo gedit ~/.gdbinit |
在 ~/.gdbinit 末尾加入一句:
1 | set context-output xxx |
设置分屏后,如果只开启一个终端,使用 gdb 可能会遇到如下报错:
1 | Exception occurred: context: [Errno 13] 权限不够: '/dev/pts/20' (<class 'PermissionError'>) |
再开启一个终端即可解决 (新开启的终端需为 /dev/pts/1)
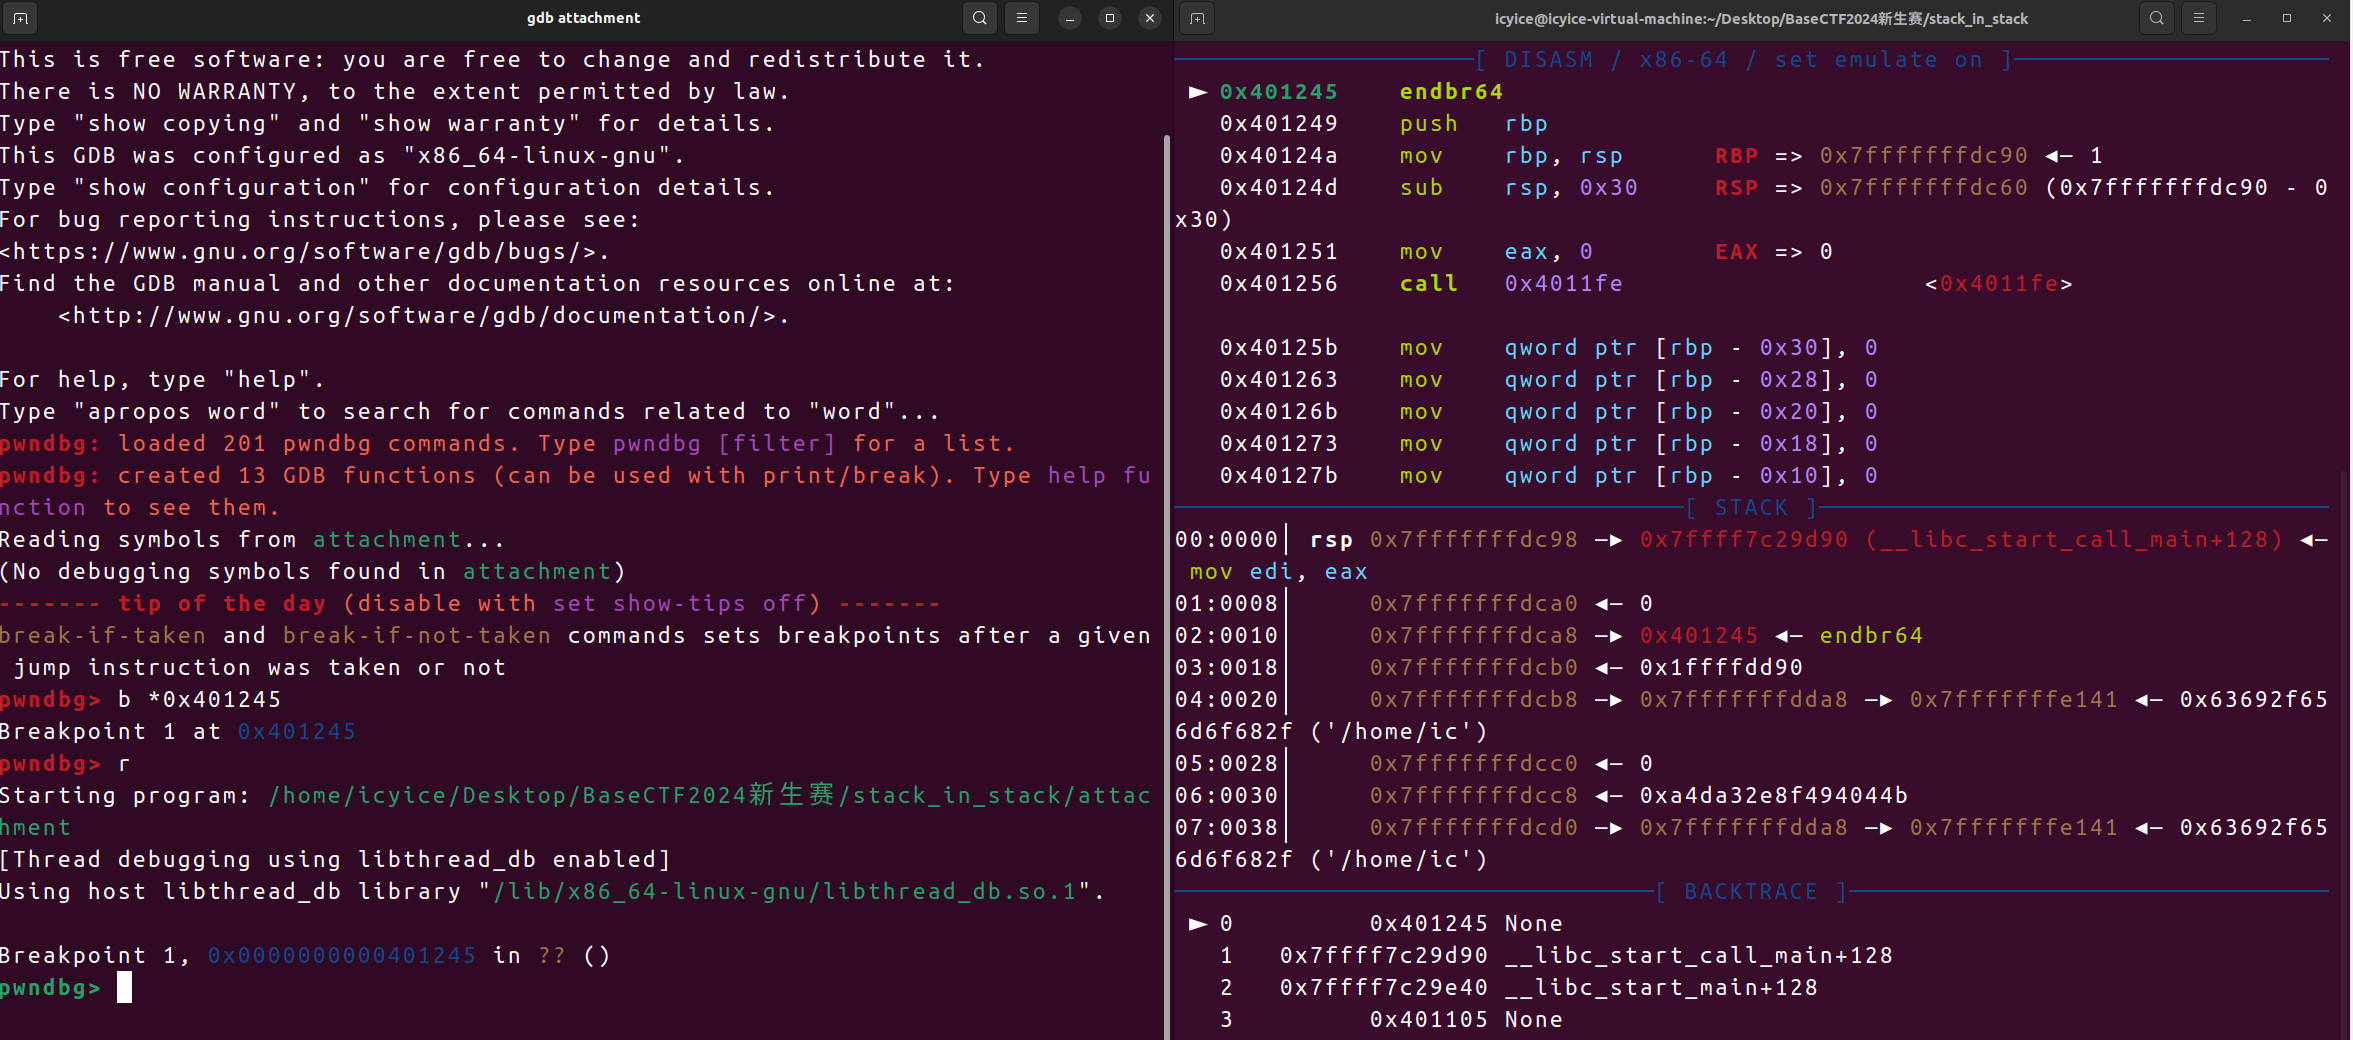
效果
本篇环境配置的教程主要参考并引用了以下几篇师傅的文章和相关资料的内容,感谢。
相关文章的链接(笔者按照长度由长到短,以此由高到低排的):
(https://starrysky1004.github.io/2024/10/05/pwn-huan-jing-pei-zhi/#toc-heading-9)
(https://www.freebuf.com/articles/system/232280.html)
 wechat